|
The photographic lighting tips, tricks, secrets, and techniques of soup photography - Part #1
|
||||||
Make sure that the table / bowl is level before you begin photographic light the soupSounds like a pretty petty thing to start out with, but I can’t tell you how many times that we’ve had everything all set and ready to go, only to find out that the soup level was tilting off to one side. So before you start to light, make sure that the bowl is level. And that doesn’t necessarily mean that one the table is level, that the bowl will be level. Many shots will have the bowl sitting on top of a napkin, table runner or something else that may influence the level of the bowl. It may be necessary to shim up the bowl after the composition is set up. What should you use to shim up the bowl? Anything will do. I like to use these little plastic shims that can be purchased at a restaurant supply store. I believe they’re designed to keep restaurant tables from wobbling, but they work really well to level soup bowls. If the leveling process requires you to shim from the front, and you’re afraid that the shims will be seen in the photo, you will probably need to shim the entire table, in order to level the bowl. |
||||||
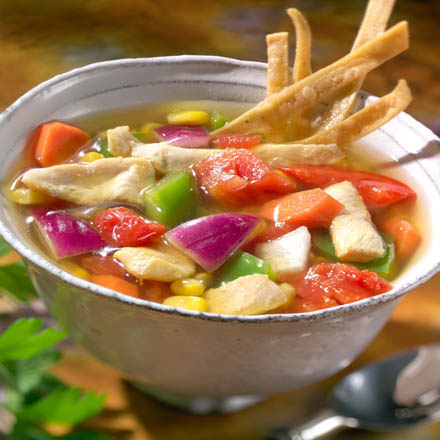
Higher than normal camera angle for soup photography because of the photography lighting needs.While I usually prefer to get really low when photographing most foods, soup requires you to go a little higher then normal. If you go too low when shooting soup, you end up with more bowl than soup. And unless your client is a china manufacturer, you need to go a bit higher than normal. Clients, for some odd reason, like to make their product the star of the shot. For the novice, it may seem logical that the higher you go, the more soup you’re going to see. While that may seem rational at first thought, in reality, it’s really not a good idea. Look down, from too high an angle, tends take away all dimension from the photo. Creating and emphasizing dimension, not minimizing it, is what the photographer needs to do to make his two-dimensional photo as three dimensional as possible. It’s hard to see that chunk of vegetable just peeking out above the surface of the soup, and the higher you go, the tougher it will be to see. There’s a general rule of thumb in food photography. Lower is better. Yes, you can go too low. But, on the other hand, you’ll be surprised at the improvement in your food photography if you just push that envelope a little and go a little lower then you think you should. |
|
|||||
|
|
||||||
Focus tactics for soup photographyPersonally, I’m a big fan of “minimum focus”, but often times the client dictates whether they want the entire bowl of soup in focus or if you are allowed to have a little artistic license. If you choose to use minimum focus, my opinion is that focusing ¼ to 1/3 into the bowl gives you the most appealing effects. I rarely see food shot where the focus has something in the back of the frame in focus and the front of the frame out of focus. But keep in mind that this is a very subject thing and for all I know, it’s tomorrow’s “new” / “hot’ trend. (Remember, you heard it here first!) One focus tactic that I really like is to manipulate the focus so that the entire surface of the bowl is in focus, but the aperture is so wide open and the depth of field is so thin that the bottom of the bowl, and everything around it is out of focus. This is a really cool effect, but unfortunately for most of you, you need a view camera to accomplish this effect. I’ve created an illustration to show you what I mean. |
 |
|||||
|
||||||
Need for higher than normal main light (photography lighting) for photographing soupWhile I like to “scrape” light across my food subjects, the lip of the bowl prevents me from keeping the main light as low as I’d like it. So, it’s a compromise, like the rest of life. I like to keep the light as low as I can while keeping the cast shadow from the lip of the bowl as short as I can get it. That is a very subjective call and only you will be able to make it depending on everything that going on. There’s no rule of thumb here. Photography Lighting for soup-chunk shape in soup photographyLike I said before, I like to “scrape” light across my food subjects in order to emphasize the texture. And with soup photography, there’s usually not a whole lot of texture to begin with, so getting as much scrape effect as possible is a major concern. One way to tweak the lighting for a little more texture is to keep the fill light as low as possible, but then again, you have that darn soup bowl lip and shadow to contend with. Soup is really a pain in the butt to shoot. |
|
|||||
Light direction is usually determined my things other than the soup itself. Sometimes the props determine the main light's placement. |
Like most other food photographs, I usually choose to come in from either 10 or 2 o’clock with my main light. I’ve found from experience, that this light direction tends to give me the most shape from my subject without getting much glare from the main light. I choose which of these two possible directions to light from usually base on the other elements in the shot. Since soup is a relatively “symmetrical” subject, it usually doesn’t matter from which direction the light will come. The only exception that I can think of for lighting from one direction over another might be in the case where there is a spoon or something else in the soup or on the bowl. In this case, I try to avoid any objectionable cast shadows across the surface of the soup. The same goes with any tall objects outside the soup, like a glass or some other prop. There have been times when a cast shadow across the main food object has been interesting, but most times it’s ends up looking like a mistake. But that doesn’t mean you shouldn’t try to push that envelope every once in a while. | |||||
|
|
||||||
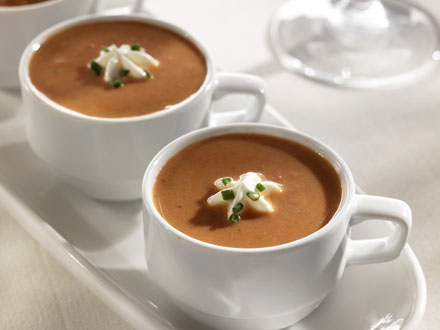
Controlling the surface reflections on soup from photographic lightingAnother thing that makes shooting soup a pain in the butt (challenging) to shoot, is the surface is very reflective. You need to be very careful in where you put your lights so as not to get any unwanted reflections in the surface of the soup. Notice that I said “unwanted” reflections. I suggest that you do get some reflections in the soup surface, but you have to be very careful where they are and also the quality of those reflections. If you eliminate all reflections from the soup surface, like most novice photographers strive to do, you end up with really boring soup. And nobody likes really boring soup. Most soup, (how’s that for a generality…) lies relatively flat in the bowl. From your camera angle, there is an area of you background that will reflect into the soups surface. If you keep any lights out of that area, you will be able to minimize any reflections that will appear in the surface of the soup. If you soup has pieces that stick out of the surface, you will probably encounter some highlights, but you’ll need some reflections to make things look a little mire interesting. |
 Soup that doesn't have much in the way of particulate protrusion, is tough to make look interesting. |
|||||
|
|
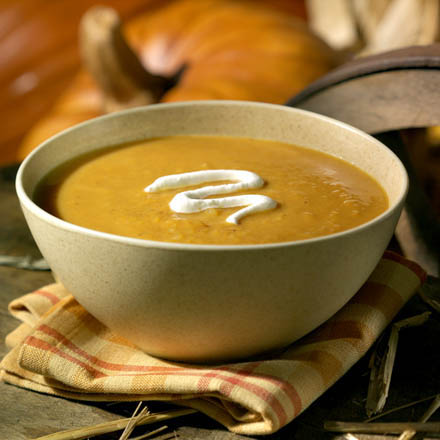
Soup is usually made up of a pool of liquid, with chunks of stuff sticking up through he surface. When these chunks stick up through the surface, they cause a meniscus to form. A meniscus is where the liquid bends up (curves) to seep up the chunk. This meniscus is where you can get some really interesting (or lousy) highlights. You can usually keep unwanted reflections off of the surface of the soup, but the meniscus is where you have the opportunity to create attractive highlights and the danger of unattractive and unwanted highlights. Actually, the meniscus will form completely around any chunk that protrudes above the surface of the soup, but for the sake of our discussion, I will be calling the meniscus on the side of the chunk that faces the camera, the “front meniscus” and the meniscus that is on the side of the chunk that faces away from the camera, the “rear meniscus”. |
|||||
|
|
||||||
|
|
||||||
|
Didn't find what you were looking for?
Join our mailing list or contact Michael Ray - Go to Michael Ray's food photography blog |
||||||