|
The photographic tips, tricks, secrets, and techniques of soup photography Part # 2
Part #2 Photographing and lighting food, and especially soup, is a lot harder than it looks. Unlike the typical food shoot, there are a few things that limit what you can do to make soup look good. Explaining how to overcome these soup-specific photographic lighting obstacles is the purpose for this article. After reading this, you will understand the many food photography tips tricks and techniques need to successfully photograph soup. © Michael Ray 2008 - Join our mailing list or contact Michael Ray
|
||
|
|
||
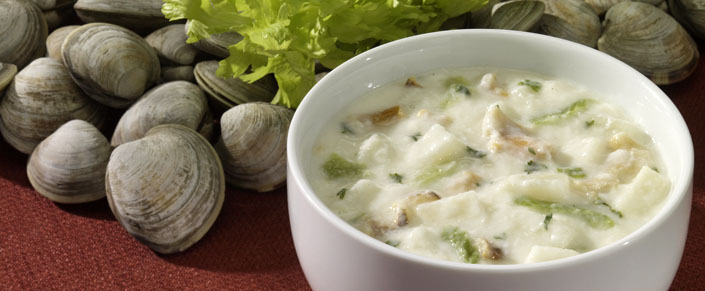
Photo Lighting for the meniscus in soup photographyTo me, this is the interesting part of this article and the thing I struggle with most often. I’ve been shooting soup for various clients over the years and until just recently, I’ve never been truly happy with the results. I’ve finally come up with a lighting setup that I’m happy with. Of course, it doesn’t work in every situation or on every type of soup, but generally, it works pretty well. Recently, I’ve added two new lights to my soup lighting set-up, an overhead box and a rear box. |
If you want to avoid glair on the top of your soup, you can't have any lights in the are marked "B". The "C" area is where the rear meniscus light should be placed and the "A" area is where the front meniscus light should be placed |
|
|
The overhead photography lighting box is another layer of fill light (more on that later) and it also gives you a really nice front meniscus highlight. You need to keep this overhead box on a relatively low power so as to keep the fill effect to a minimum and also to keep the meniscus highlight appealingly transparent. The front meniscus highlight really adds a degree of interest to the whole shot and is what’s missing in most food soup shots to make them look good. This is the biggest key to good soup photography, in my humble opinion. Good frontal chunk meniscus lighting is very important, (say that three times really fast :+) but there is something else that I’ve discovered recently that is really kinda cool too. It’s the rear meniscus light. |
|
|
|
The last few soup projects I’ve shot have included a large strip box directly behind the soup and low enough so that it avoids the main glare angle of the soup surface. (See illustration) This light gives my photos that little bit extra dimension that makes the soup surface a little more interesting than normal. This light too, needs to be kept at a relatively low level compared to the main light. You just want a little “something” going on and not a big-ass “ching”. As you become better as a photographer, it’s all about the subtleties. |
||
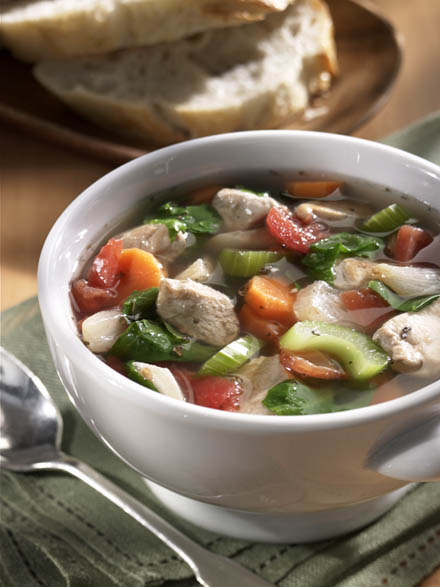
How to photograph and light flat soupI call soup that doesn’t have any particulate matter protruding from the surface, flat soup. In this case, there is nothing to “scrape “ light across, to give you interesting texture, and without texture, the soup can tent to look a little boring. In cases like this, I like to add a little glare into the surface of the soup. Yes, the same glare that I try to avoid on any other soup shot. One technique that I use is to put a large piece of smooth foam core behind the soup and shoot a soft spot light (grid spot) into it. This allows me to graduate the glare and put it where I want it. I try to avoid putting too much glare across the surface of the soup, because this tends to obscure the elements beneath the surface (if there are any) and it also tends to fog over any color that the soup or broth my have. Usually, I try to just put a little glare across one corner of the soup, covering maybe 10-20 % of the surface area. I don;t think it's a perfect solution, it's just that I haven;t found a way yet to make this kind of soup more interesting. If you have a better idea, I'm all ears... |
 |
|
|
|
||
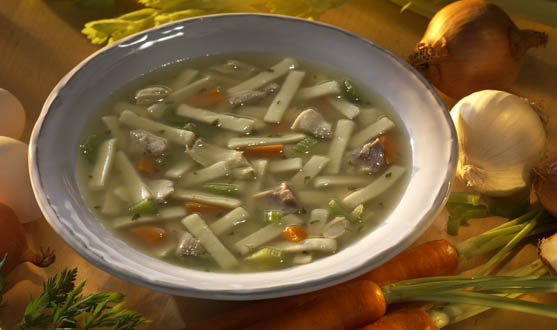 |
Lighting in the inside of the soup bowlBecause I usually use a small light source that casts a sharp shadow, I can use mirrors to redirect the light back into areas where I want the light to go. Often times, I will use a mirror or mirrors to lighten up the inside of the soup bowl. By using a mirror, I can keep the light on the soup and off the background elements. That comes in really hand when you’re trying to lighten up the soup and still keep your current lighting effect and light ration on the rest of the composition. |
|
|
The only problem with using mirrors is that you usually end up giving you very crisp (small) highlights. And again, you’ll have to weigh what you want, against what you get. Photographic lighting is truly a compromise. Like the song says, “you can’t always get what you want... you know the rest.” Another thing you need to remember when kicking light into the surface of the soup. As you add more light, you are negating the effect of your main light by filling in the shadows of the chunks and diminishing the three dimensional effect caused by scrapping the light across the surface of the soup. You are adding a fill light and the more fill you add, the “flatter” your lighting will become, even if it’s in a selected area. Only experience will let you learn what’s best. You will need to develop an eye from what’s best. |
||
|
Up until recently, I’ve usually chosen to use mirrors to lighten up the lip of the bowl and fill to “chunks”. I’ve always used my “true fill” technique to add fill to the whole shot, but recently I’ll been adding an “overhead” medium box to add a little more fill where I want it. What I find interesting about this new technique of mine, is that it has the added effect of actually adding another layer of shape to the photo. Frontal fill, that I call true fill, actually tends to lessen the shape caused by the main light, but by adding an overhead light too, it sort of wraps the main light around background elements a little. You can most often see this effect of cylindrical objects lying on their sides. (Corn, beans, napkins rolled up) This effect is relatively subtle, but to a professional that can see the difference, it makes a huge difference. The key is to have the overhead box a little farther back than directly overhead. Another benefit of using a box instead of a mirror, is that the highlights created by a box on the front meniscus are much softer that those of a mirror. And sometimes, softer is more attractive. |
||
|
|
||
Photographic Lighting the outside of the soup bowlRemember, soup photography is only part of the battle. The soup is usually in some sort of environment, and you’ll need to make that look pretty too. I like to kick back the light from the main light into the outside of the bowl to give it some shape. The trick here is to keep the reflector (usually mirror) so low that it doesn’t kick any light “into” the bowl, just onto the outside of the bowl. If the mirror is too high and light is reflected into the bowl, you’ll end up with a double shadow on the rear lip of the bowl. Not good. And here, you thought that you just stuck a light anywhere beside the camera and you were fine… :+) |
||
|
|
||
|
|
||
|
Didn't find what you were looking for?
Join our mailing list or contact Michael Ray - Go to Michael Ray's food photography blog
|
||