|
|
||||||
|
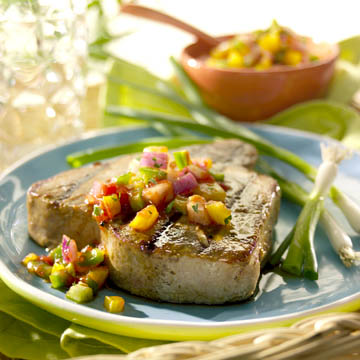
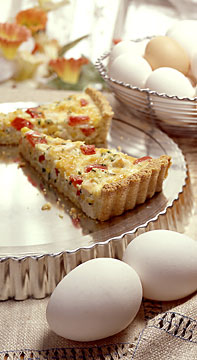
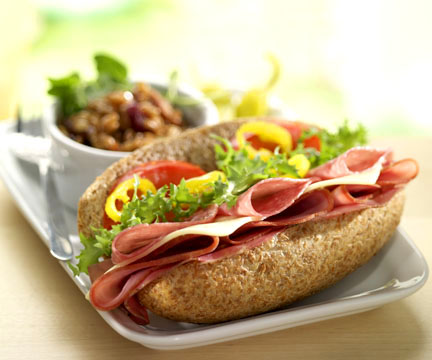
Visit Professional Visit the food Photo books can capture the memory of your favorite food. |
|||||
|
|
If there is too much entertainment and not enough information, and you’re failed as a food photographer. Too much information and not enough entertainment (interest) and you have a boring photo. Go to any good food magazine and look at the POVs of the photos you really like. Are they form a “normal” camera angle or from below normal? Cropping for food blog photographyThere are two aspects of cropping I want to talk about, one is horizontal vs. vertical, and the other is “tightness”. Most cameras allow you to shoot an image that is either horizontal or vertical. Professionally, I’m requited to take either vertical or horizontal depending on the layout of the ad, billboard, or brochure I’m shooting for. I may need to leave room over top of the plate for type, or I might need negative space to the right or left of the plate for a UPC code or company logo. Unless you’re shooting with preconceived limitations on your photo’s usage, I suggest that you shoot horizontal. Yes, there may be times when shooting vertical is a good idea, but most of the time I suggest that a horizontal shot will give you a better final image. |
|||||
|
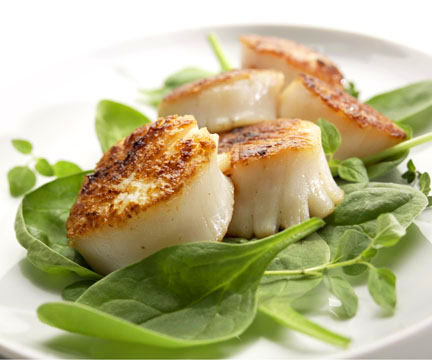
Lets say that you do as I suggest and get down “lower than normal” for your camera angle. One thing that this does is to make your plate of food VERY horizontal. If you tilt the camera so that the crop is vertical, you end up with a lot of your image area containing no food. Usually, that’s not a good thing. You’ll either end up with a bunch of image area that you’ll need to populate with something interesting. You will either need a bunch of props or a bunch of background to fill up all that negative space. Whichever you choose, props or background, your shot will contain less food and more “other stuff”. MOST food photos are supposed to be about the food and not about the other stuff. Yes, there are exceptions. Lets say that the restaurant in the background or the kitchen that’s occupying the majority of our image area, is an important element of your blog post. In a case like that, I can see where I vertical images might be a good idea. Just keep in mind that normally, the more area of your picture that is taken up with food, the better the photo. Bigger is better, most of the time. The bigger the food in your food blog photo, the better… Another basic rule-of-thumb for cropping food photos is “the tighter the better”. The closer you are to the food, the more appetizing it usually appears. Yes, like anything else, there are exceptions and you can over-due it. Nine times out of ten though, you will improve your photo by moving the camera a little closer to the food or by using your photo editing software to crop the picture a little tighter. Try it. You’ll be amazed at how much of a difference this will make. One reason that cropping tighter usually improves the picture is that the individual elements of food become more identifiable, and therefore more appetizing. People like to know what they’re eating. If the photo appears to be nothing but a blob of unidentifiable stuff, it’s harder for the viewer to relate and enjoy your food. Get in close so that people and really see what you’re illustrating. Remember, conveying information is a big part of food photography. The closer you are, the more information there is for the viewer to identify. |
Food Blog Photo TipOne argument people make about cropping in tight is that it affects the concept of abundance in a food photo. I find this to be not true. If I want to communicate “many” in a photo, I prefer not to have all the elements “end” in the photo but rather crop into the sides of the outside food elements. This cropping gives the impression and lets the viewer imagine that the elements go on and on. If you show the completion of the elements, the viewer “sees” the end and does not have to “imagine” how many items there are. |
|||||
|
Look how small the food is in the shot and look at all the stuff you need to deal with in the background. The food would look a lot better ifI would have moved in and shot horizontal. |
The other reason that “closer is better” is that you have less background elements to compose and deal with. Remember, food photography is mostly about the food, not the other stuff you need to take up the negative space of your photo. Minimum focus / maximum focus for food blog photographyLike I mentioned earlier, one way to direct the attention of the viewer is to use selective focus. By using a large aperture on your camera, (low f#) you will decrease the depth-of-field in your picture. This effect makes the viewer look at a small area of the picture and lets the background become less important. Most people find this to be one of the things that separates armature food photos from professional food photos. If you can figure out how to use this technique successfully, your photos will improve noticeably. If you don’t believe me, go back to your favorite food magazine and see if you’re attracted to the photos with less or more focus. You’ll still be able to find lots of photos that have a lot of depth of field, even though it doesn’t look as good. I the world of advertising, many product managers can’t bring themselves to spend all that money on an ad for their product and have even part of their product out of focus. Big mistake, but it happens every day. |
|||||
Plate selection for food blog photographyWhen it comes time to select a plate for your food blog photo, I suggest that you choose a plate that is on the “plain” side and on the “small” side too. You normally don’t want the plate to distract from the food. If the plate is really cool or even really ugly, people might end up looking at the plate and not the food. That’s not good. If you’re going to crop in so tight that the rim of the plate is cropped off, then the size of the rim isn’t really an issue. If you’re going to include the whole plate in the shot, I would strongly suggest that you use a slightly smaller plate, a plate with very little rim, or use slightly larger food portions. Either way, you’re trying to minimize the rim of the plate. Personally, I find the rim to be distracting from the food in most food photos. Again, the more of “anything else”, and the less food that take us image real-estate, the weaker the shot usually is. And since the rim is right next to the food and is usually white, it can tend to dominate the photo. If the plate is some tone of white, and most plates are, it will be especially distracting. Viewers tend to look at the lightest part of any photograph first. I would prefer that my viewer be looking at my food and not the plate., unless I’m selling plates, that is. :+) |
||||||
Propping for food blog photographyI consider propping to be all the stuff in the picture that isn’t the plate or the food. For me, the main purpose of props is to artfully take up space in my composition while at the same time, adding to the feel and ambiance of the photo. There are times when the propping “makes” the photo and other times when the props ruin the photo. Remember the rule of thumb. The tighter the better. The tighter you are on your food, the less propping you have to worry about. If you have a large area of your photo that doesn’t contain food and you don’t like that area looking “naked”, then add a prop of some kind to better use the space. Sometimes negative space is a good thing and sometimes it’s not. The difference is totally out of the realm of this article. You’re on your own when it comes to composition. Sometimes less is more and sometimes less isn’t enough. :+) Your call. You’ll find that if you shoot too loose, you’ll need more props to populate the background of your photos. Any props you decide to use should support the type of food you’re shooting. In other words, the viewer shouldn’t need to wonder what the heck that thing is in the photo. Use things that are normally on a table - flatware, salt & pepper shakers, butter dish, bread plate, cups, glasses, bread, while bottles, napkins, hamster cage. You know, all the normal things. Remember, if you shoot tight on your food, these other elements will be less of an issue and will not upstage your plate of food, and if you use minimum depth of field, then they’re even less of an issue. |
|
|||||
|
|
White balancing for food blog photographyMost digital cameras allow you to choose a white balance setting. If you’re using tungsten light then of course you set the camera to tungsten and the same goes with florescent light or whatever… If your camera allows you to tweak the color with some type of color temperature setting, you might want to go a little “warm” on the color. With food, warm (yellow) is usually better than cold (blue). Warm color temperature usually adds to the mood of the shot. Yes, like anything else, you can get carried away so be careful. Lighting Technique for food blog photographyOkay… This is where most of you food bloggers need the most help. From what I can tell, most bloggers turn on their on-camera flash and take a picture and then wonder why their pictures look like crap. The first thing you need to do is turn off the flash. Not that a flash is not a good light source, quite the opposite. I use flash equipment on almost all my food photography. The problem with on-camera flash is where it’s positioned, on the camera. |
|||||
Create shape for food blog photographyIf you’re new at photography, you’re probably under the impression that as long as you have “enough” light, you’re good to go, while professionals know that it’s all about the quality and direction of the light. A good photographer will use light to illustrate and enhance the shape and texture of the food. Read that line again. One more time. That, more than anything else, is what differentiates a so-so photographer from a good photographer. The placement of the main light, whether your main light is a lamp or a window, will give your photo shape and texture. This is what will either give your subject a three-dimensional look or a two-dimensional look. A light coming from the front, like your on-camera flash, will totally flatten out your subject and make everything look bla… If, on the other hand you take your light around slightly behind the subject, you will be totally amazed at what happens. Now when I say “take your light”, I realize that you can’t move a window in the wall, but what you can do is spin your table so that the window is now positioned where you want it to be in relationship to your plate of food. Think out of the box… The exact placement of the main light is one of the biggest decisions a food photographer makes. Sometimes, just an inch or two really, makes a huge difference. I can give you some general rules-of-thumb, as a starting point for light placement, but there might be unforeseen things about your composition that will require you to tweak your light one way or another. At first you might think that if you place the main light on the right side of the picture, it will give better shape to your food only to find out that there is a big-ass shadow from other element falling somewhere you don’t want it to. At that point, you have to decide whether you need to recompose or to change the placement of your main light. Life is a compromise, and so is food photography… Here’s what you should look for when placing your main light… You want to “scrape” light across the surface of the subject to show the texture while placing the light to enhance the shape of the food. There are basically four shapes of stuff in the world –rectangle, cylinder, sphere, and flat. (I sort of made that “flat” thing up. I don’t think you’ll find that in any book) So what shape is a hotdog? Cylinder. A steak? Rectangle. Soup? Flat. Pancakes? Cylinder. Apple? Sphere. There are classic ways to light each of these shapes so that you illustrate their primary characteristics. That’s your main job as a photographer, after you get past the focus, exposure and stuff… Light for shape and texture. That’s what will make you a “good” photographer. |
||||||
 |
|
Care to join our |
||||
|
One other thing I wanted to mention about lighting. To show shape, you want to make sure that you can see edges of things that have edges. For example… A steak has a top and a side. If you set up your lights and the top and sides of the steak seem to merge (tonally) you need to move the light so that you can see the edge. You’ll probably need to raise the light slightly so that the top of the steak becomes a little brighter than the side. That difference in tone will make the shape you’re looking for. When in doubt, the top of anything should usually be brighter than the sides or bottom. Yes, that’s a rule of thumb, but sine God made the sun come from above, we humans tend to expect the tops of things to be brighter than the sides. One thing most new photographers do when they start out learning to light is to place the light too high. This tends to decrease the overall texture of the elements in the photo. That’s why most outdoor landscape photos look better when they’re either taken at dusk or dawn. Late in the day, the sun scraps across the landscape, showing off all the texture of the countryside. Shoot the same scenery at noon, and the photo will appear totally different, and not nearly as nice. The same holds true with most food photos. Choosing a low light height usually enhances the texture in your food photo. Remember that… |
||||||
|
Okay, to save you some time, here is where I normally start off with my main light… If you think of the set as a clock face and the camera is at 6:00, my lights are usually at either 10:00 or 2:00. This main light placement tends to give you good shape. If you go any closer toward 12:00 with the main light, you’ll start to get harsh reflections off of the top surface of your food or prop elements. This suggestion is only a starting point. Move the light around and see what happens. Sometimes you’ll run into what I call a “happy-accident”. A Happy accident is something that would normally be against the rules and normally doesn’t look good, but in this particular case, ends up looking kind of cool. Remember, breaking the rules usually results in something looking a little different. Different = good. |
|
|||||
 |
As far as light height goes, I like to keep the light back from the subject about 8’ or so, and keep the light at about 5-6’ off the ground. (with the food at a normal table height) Your setup will probably be a little difference because of your particular equipment, but this will give you an idea of the geometry of my normal setup. So far when talking about lighting, I’ve been talking about the main light. Since God made only one light (the sun), we’re kind of used to the idea on only having one shadow. The problem we have as photographers is that the sun has the sky to “fill in”(lighten) the shadows and there is no sky in our kitchen. To make up for that shortfall, we photographers use what we call a “fill light”. The idea behind a fill light is to add light from the front to “fill in” (lighten) the shadows created by the 3/4 rear main light suggested above. In order to emulate the sky, the fill light should be as shadow less as possible. This is where your bed sheet comes in. If you bounce a light off of the sheet near the camera, it should help fill in the shadows. |
|||||
|
The trick to using the fill light is to add just the right amount of light. If you don’t add enough light, the shot looks too contrasty, add too much and the shot looks too flat. You’ll have to experiment to see how much light is enough. As you’re learning, lean toward “not enough” fill light. If you do, you’ll be quicker to learn about the concept of shape. BTW – When you are setting up your main light to see where exactly you want to place it, turn off as many lights as you can in the room, including the fill light. You won’t be able to see shape with all the lights on. Even though the test shots will be way too contrasty. But you’ll be able to see what happens when you move your main light around. Once you’ve determined the best placement for your main light, add fill gradually until your happy. Better yet, add more fill than you like and then gradually lessen the fill until you’re happy. That way you’ll know what it would of looked like and you’ll have learned something. Some shots need to be more dramatic then others and sometimes you won’t know what contrast is best until you’ve gone too far. |
||||||
| Well, that just about does it. I have some things I’ll probably add to this page when I get a chance, but for now, this should give you food bloggers so much-needed tips for making your food photography a little better. Feel free to contact me with comments or questions. |  |
|||||
|
Care to join our mailing list? Return to the Food Photography Blog Didn't find what you were looking for? |
||||||
.© Michael Ray 2008